Wednesday, June 8, 2011

P is for...Pyramid Purse!

P is for…PYRAMID PURSE!
Tee-pee, pyramid, triangle...it’s a cute little purse! Actually, a friend asked me recently if I keep my isosceles triangles in them...very funny...
I have to apologize. I have made the statement before that I am NOT a seamstress. I learned when trying to post this that explaining to someone how to sew when you are really no good yourself is very, very difficult. If you want some good directions, come on over...I'll be more than  happy to show you!
This has got to be one of the easiest sewing projects I have ever done! I can finish one in about 10 minutes. Once a person learns how to sew in a zipper it’s a piece of cake. I hate zippers. They are tricky and if anybody has some great tips…please let me know!
Here are the step by step instructions for making a Grosgrain Zipper Bag. I hope this unique project will become a favorite for you to stitch out as well!
These are all the items you will need…
Grosgrain ribbon that is 1 ½ inch wide
Liquid stitch…or pins
A 5” zipper

Okay…so I know that some people like to use pins. That’s perfectly fine. However, with ribbon, it tends to put holes in it. The liquid stitch keeps it in tact much better. Just make sure you use a tiny bit…it’s all you need.
And with the zippers…I also know that it is VERY hard to find 5” zippers in fun colors. So, simply take the zipper and sew across the teeth where you want the zipper to stop. Cut off the excess material.
Cut the ribbon into 8 -5” pieces.

Then take 4 pieces and  glue or pin the sizes of the ribbon together so that they overlap by 1/4"


Repeat with the other set of 4 ribbons
Once the glue as set, sew the pieces of ribbon together. Remember, there isn’t a lot of material to sew!

Sew all sections that have been glued or pinned...creating 2 sections.
Now…the dreaded zipper…
UNZIP THE ZIPPER. (you'll kick yourself later if you forget!). Pull the two layers of fabric in the other direction, centering the zipper between the two sides.
Line up the edge of the ribbon that is the widest with the zipper. Glue or pin it down. Whichever fabric you want for the exterior of the bag should be on the TOP side of the zipper. Sew the zipper down. Pull the two sets of fabric that you've just created, so that the zipper is as centered as you can get it. Make sure you pull the fabric rather taut so that you don't get any pinched or wrinkled bits. *DO NOT DO THIS WITH A METAL ZIPPER!*

Sew the zipper in. Repeat on other half.

Now take your piece of ribbon with the zipper neatly sewn in :) and fold it in half with the wrong side out.
Sew across one side of the bag. I like to use the side that the zipper starts to open on. Keep the zipper closed at this point, it will make for a cleaner sew line.
OPEN UP THE ZIPPER...AT LEAST PART OF THE WAY.
Now, sew across the bottom of the bag.
The next part is what is going to make it into the pyramid.
Grab the bag and pull the remaining side so that the seams top and bottom seams are lined up. Creating a triangle effect to the bag.


Pull the sides so that the edges line up as straight as you can get them.
Sew up that side.
Turn the bag right side out...zip it back up!
Add a small piece of ribbon to the zipper so that it is easier to open and close.

And the finished product...super cute...super easy! Like I said...I am horrible with sewing directions. I would be more than happy to show you how to make them!

O is for...Orient!

O is for... Orient!


I love me some Chinese food! I found this recipe for egg rolls a while ago…and have tried it a few times. Just recently I made egg rolls, fried rice and fortune cookies for dinner. I would not post something if I didn’t absolutely love it! Here was our dinner…try it…it’s easy! Enjoy!
Egg Rolls
4 tablespoons Vegetable oil
1” grated fresh ginger
2 cloves of garlic…finely chopped
2 scallions…sliced thinly
1 carrot…cut into 1” julienne strips
1 small red pepper…cut into 1” julienne strips
1 Napa cabbage…shredded
¼ cup chicken broth
2 tablespoons soy sauce
1 tablespoon sugar
1-2 tablespoons sesame oil
20 wonton wrappers…covered loosely with a damp paper towel to prevent drying. I used egg roll wrappers. I have made them both ways…and the egg roll wrappers are better.
This recipe calls for 20 cooked shrimp…but I don’t like it that way. I throw in some cooked chicken…or nothing if you just want to go with a vegetable egg roll.
I encountered a problem almost immediately. The grocery store that I went to did not have fresh ginger. Hmmmm…so, I purchased Stir Fry Seasoning…garlic and ginger blend. It was still very good!

In a skillet, stir fry the ginger and garlic in 2 tablespoons of oil until fragrant. (If you choose to use the seasoning like I did, it takes quite a bit to season it! I bet I used 2 tablespoons) This takes about 30 seconds. Add scallions, carrots and red pepper. Stir fry over high heat for 2 minutes.
In a bowl, combine the chicken broth, soy sauce and sugar. Add cabbage and broth mix to pan. Bring to a boil and simmer for 5 minutes. Stir occasionally until vegetables are soft. Add sesame oil. Cool for at least 15 minutes and strain. STRAIN WELL…OR YOU WILL HAVE SOGGY EGG ROLLS. Fold in the chicken (or shrimp).
Fill and roll egg roll wrapper with about 1 tablespoon per roll. If you choose to use a traditional egg roll wrapper, use more filling.
Brush top corner with water and roll up diagonally. Fold in sides.
In a skillet over moderately high heat, heat the remaining oil and sauté the egg rolls until golden brown on both sides. Using tongs to turn them. From experience, get the oil hot, add the egg rolls and turn down the heat, slightly. They won’t burn as quickly.
I set mine on a paper towel (on a plate) to get rid of some of the oil.

Fried Rice
2 cups white rice (I used brown rice and prepared it according to the package directions)
4 cups water
2/3 cups chopped carrots
½ cup frozen green peas
2 tablespoons vegetable oil
2 eggs (I actually used 3 eggs)
Soy sauce

In a sauce pan, combine rice and water. Bring to a boil. Reduce heat, cover and simmer for about 20 minutes.
In a small saucepan, boil carrots in water for about 5 minutes. Drop peas into boiling water then drain.
Heat wok (or skillet) over high heat. Pour in oil, then stir in carrots and peas. Cook about 30 seconds. Crack in eggs, stirring quickly to scramble them with the veggies. Stir in cooked rice. Add soy sauce if desired. Again, from experience, the soy sauce is needed!
The next part of my dinner was something out of the ordinary. I had a BLAST making them. Coming up with the fortunes was fun! They are so good! Seriously…way better than store bought! I made a batch…and immediately made another batch. They go quickly in my house!
Fortune Cookies
2 Egg whites
½ teaspoon vanilla extract
½ teaspoon almond extract
3 tablespoons vegetable oil
8 tablespoons flour
1 ½ teaspoons cornstarch
¼ teaspoon salt
8 tablespoons sugar
3 teaspoons water

Write fortunes on pieces of paper that are 3 1/2” by 1/2 “wide. Preheat oven to 300.
Grease a 9x13 baking sheet
In a medium bowl, lightly beat egg white, vanilla, almond and vegetable oil until frothy, but not stiff.
Sift flour, corn starch, salt and sugar into a separate bowl. Stir in water with the flour mix.
Add the four mix to the egg white mix and stir until batter is smooth.
Place level tablespoons of batter onto cookie sheet. Spacing them about 3” apart. Gently tilt the baking sheet back and forth and side to side so each tablespoon of batter forms into a circle about 4” in diameter.
Bake until the outer ½” of each cookie turns golden brown and they are easy to remove from the pan with a spatula. (about 14 minutes)
Working quickly, remove the cookie with a spatula and flip the cookie over in your hands. Place a fortune in the middle of each cookie, fold the cookie in half. Use the edge of a glass to fold in half again. Press together. Place cookie in muffin pan to hold the shape.
Please take this advice…put 3 on a cookie sheet. They set very quickly when you take them out of the oven..and they are incredibly hot. You have about 20 seconds to complete the entire pan. The fewer you have to get done the better they will turn out!


And maybe double it right away…seriously sooooooo good!
So…this was our Monday night dinner! It was delicious!

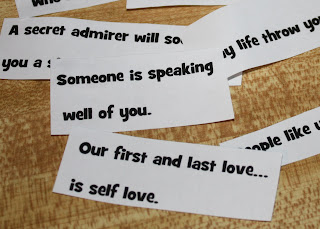
And what fortune did I get?? This was in my cookie…

Thursday, June 2, 2011

N is for...New Recipe!

N is for…New Recipe!
Chicken Piccata
I cannot stress how much I love to cook. I could spend all day in the kitchen concocting new menus and revamping recipes.
A friend recently sent me this recipe. At first, I was a little hesitant. Capers. That’s what threw me off. I just couldn’t understand how a pickled part of a plant could possibly make food better. Plus, I was warned by multiple people to NOT try them by themselves. That sounds real enticing.
 I couldn’t find them. I looked everywhere for the small jar of pickled plants. I asked multiple people in the grocery store up here and NOBODY knew what I was talking about! I finally came across them…and was thrilled! Still hesitant…but thrilled to have FINALLY found them!
So…here we go! This recipe was very easy to make and impressive, too! It called for some frying of the cutlets, but I kept the heat to medium and the splattering wasn’t an issue. And everything cooked in one pan…which I LOVE…for 2 reasons. 1…very little clean up and 2…the flavors are more easily blended together.
Ingredients:
2 chicken breasts
¼ cup flour
2 tablespoons grated parmesan cheese
1 large lemon, juiced
2 tablespoons white wine
1 tablespoon capers
Mushrooms…the amount is up to you. However, it was suggested to me to go heavy on the mushrooms and capers…or you will be sad when you run out!
2 tablespoons olive oil
1 tablespoon cold butter
Salt/pepper
Paprika
1.   Cut the chicken breast halves horizontally. If needed, pound with a meat hammer to ¼” thickness. The thinner the better.

2.   Mix together flour, salt pepper and, paprika and parmesan cheese. Rinse the chicken pieces in water. Dredge them thoroughly in the flour mixture. Let sit for 2 minutes. Dredge again until well coated.


3.   Heat olive oil in a large skillet on medium heat. Brown chicken on each side. Remove from pan and reserve them in the oven to keep them warm. I used some aluminum foil and set them in the oven.

4.   Add the wine, lemon juice mushrooms and capers to the pan. Stir together. Reduce. Remove from heat and add cold butter.

5.       Plate the chicken and serve with the sauce pored over.
I also made mine with angel hair pasta…per suggestion of my friend.  I also made some pretty rockin’ garlic bread. It was an amazing meal!
Oooohhhhh…and buy extra white wine. It goes really well as a beverage with this meal! :)
Try it! Highly suggested…who would have thought that a small little pickled plant could make a recipe sooooo yummy!